Seestar S50 In Depth Review
This article was updated on October 25, 2024, to include the latest features.
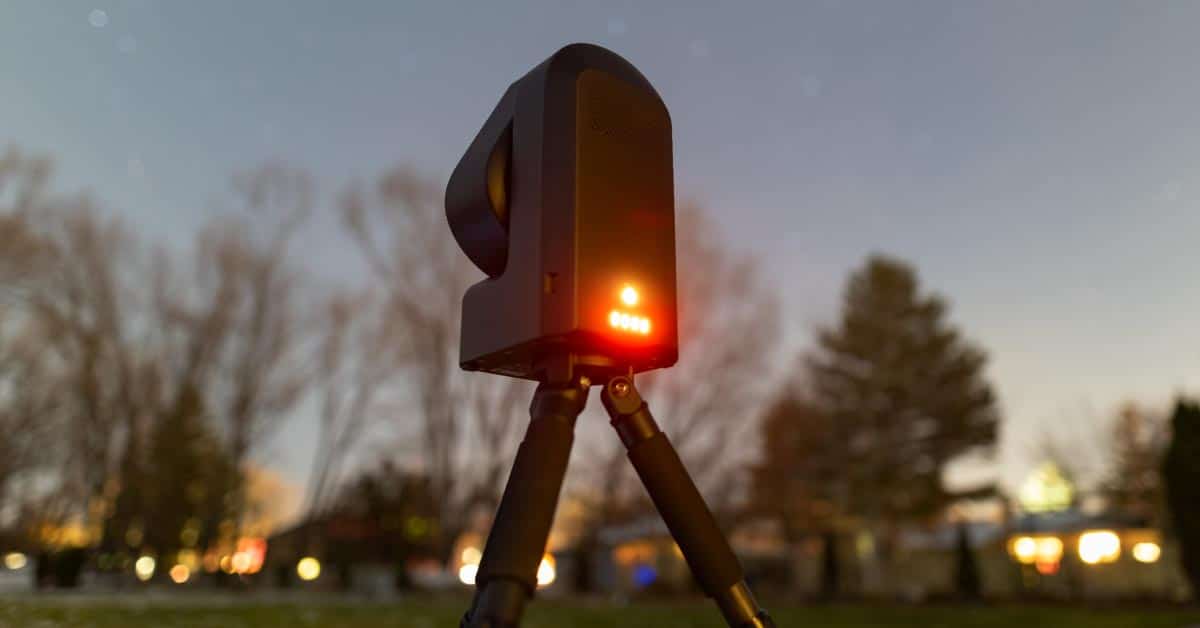
The SeeStar S50 is an all-in-one smart telescope that makes astrophotography easy. While its main goal is to deliver electronically assisted views of objects in space, the pictures it takes are pretty darn good.
If you thought smart telescopes were just “expensive toys,” you’d be surprised to see some of the incredible deep-sky images captured with this device.
While this little telescope package is not exactly high-end in terms of photography performance, it does an admirable job with what it’s working with. The Seestar lets anyone take their own astrophotos without any previous photography experience.
It does all of the difficult parts of the astrophotography experience for you. You don’t have to worry about polar alignment, finding objects, or focusing the camera. You just pick the object you want to see, it off it goes.
With a current price of $499 USD, the Seestar S50 is one of the cheapest, fastest, and easiest ways to get an impressive photo of the Moon, the Sun, and deep-sky objects such as galaxies and nebulae.
If finding and capturing pictures of objects in space isn’t enough, it calibrates and stacks the image data internally, too. This means you have an impressive, stacked, and stretched image ready to share within minutes.
In this article, I will share everything you need to know about the mighty Seestar S50 all-in-one telescope, including its biggest strengths and weaknesses. You can also watch my video review on YouTube.
The Seestar is available for $499 (USD) at Agena Astro.
Seestar S50 Review
While the debate continues as to whether or not images captured by the Seestar are considered to be ‘astrophotography’ by its traditional measure, you can’t argue with the fact that the Seestar delivers results at an impressive price point.
I must admit that it doesn’t feel like I really did anything when I captured the images on this page—unless you count placing the device on the ground and pressing a few buttons on the mobile app.
However, the same could be said about highly automated astrophotography setups and personal observatories. I think the point is that everyone has their own preferred level of interaction with their equipment when taking photos.
The Seestar S50 is great for exploring, outreach, and enjoying astronomy with your friends and family. It is not meant for serious deep-sky astrophotography projects that you intend to submit to competitions or print in large format.
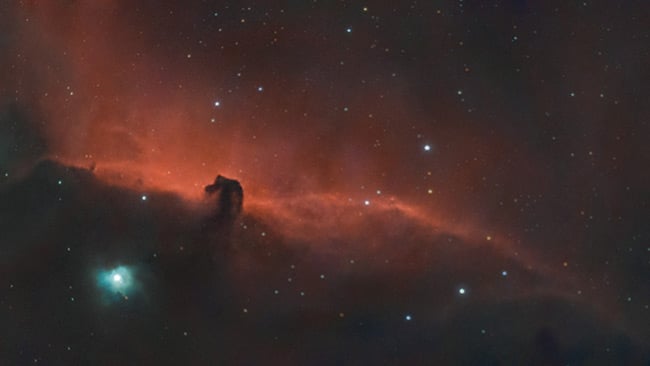

The Horsehead Nebula by Brian Fulda. Seestar S50. Stacked in AstroPixelProcessor and processed in Photoshop.
Who the Seestar S50 is for:
- Beginners looking to photograph the Moon, Sun, and Deep-Sky Objects
- People who want an easy way to locate and view objects in the night sky using EAA
- People interested in astronomy that don’t have the time or resources to dive into astrophotography
- People interested in facilitating astronomy outreach and education
Who it is NOT for:
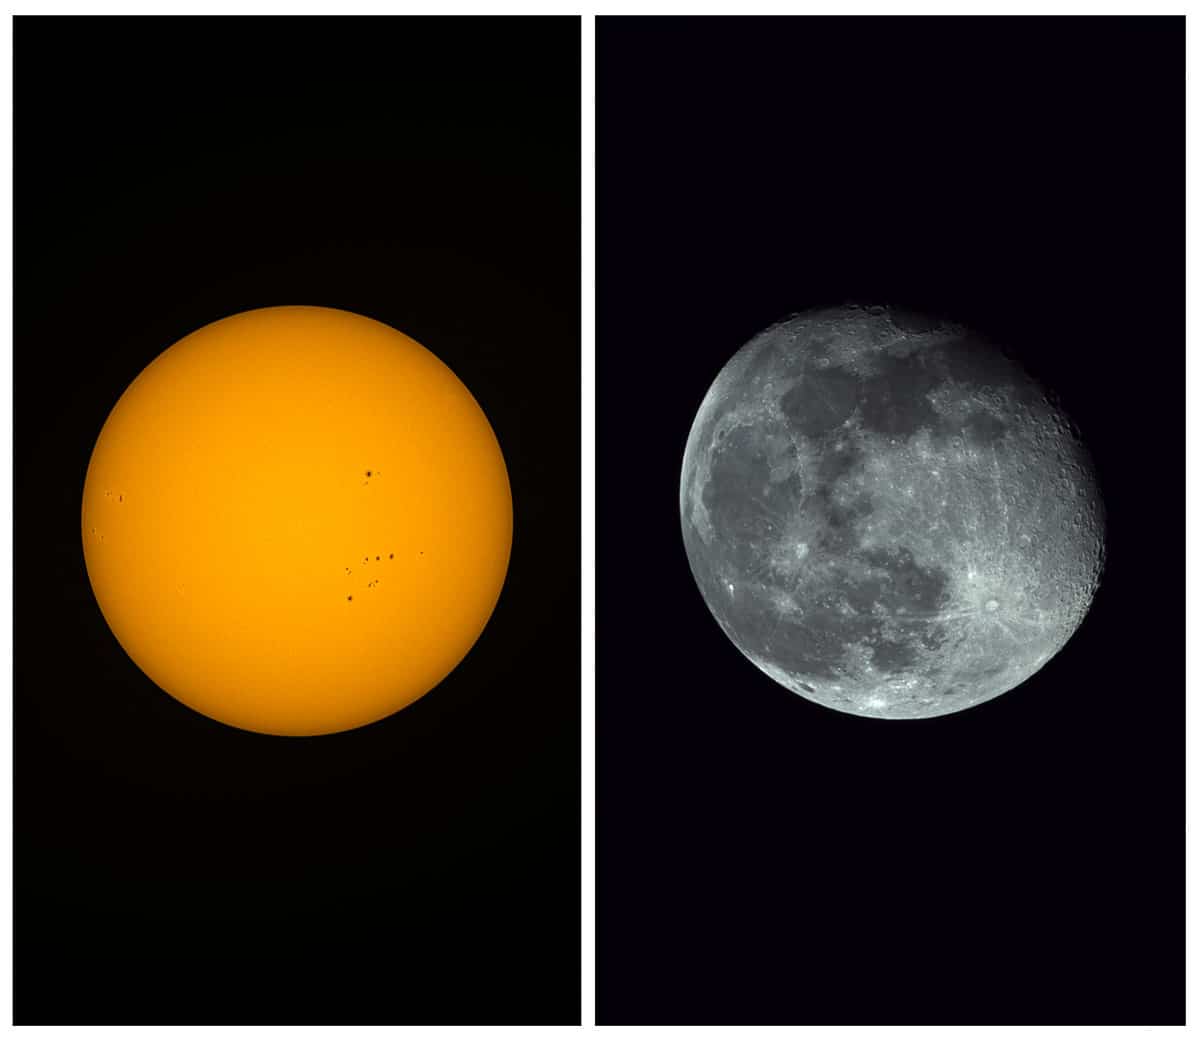
The Sun and Moon captured using the Seestar S50 smart telescope. Slight edits in Adobe Photoshop to the original images.
What’s Inside the Seestar S50?
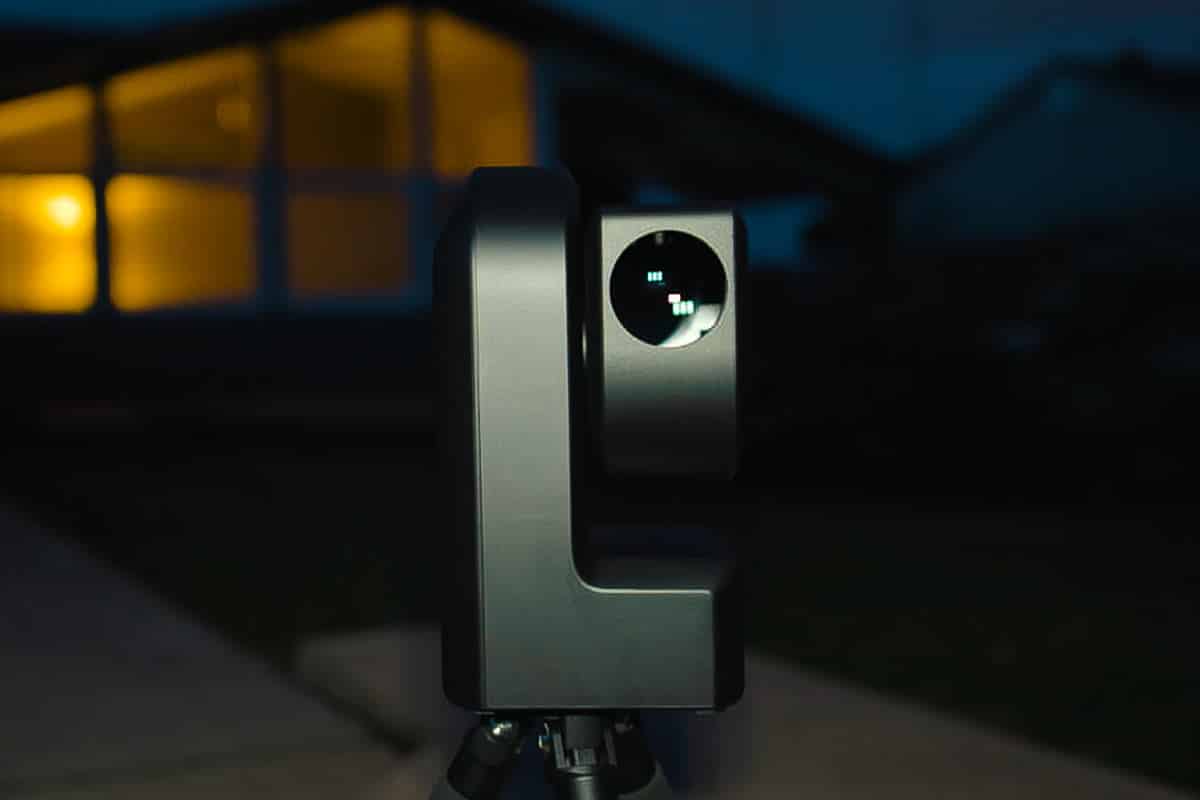
Inside the Seestar unit is a 50mm triplet apochromatic refractor telescope, a dedicated astronomy camera, a light pollution filter, a built-in dew heater, and a tracking GoTo mount. Yes, it’s an alt-az mount, but it works.
The internal light pollution filter, which is a dual-band filter (similar to the L-eNhance), can be turned off and on depending on the project. By default, the light pollution filter will be automatically applied when you capture most nebulae in the night sky.
The addition of this light pollution filter makes the unit a lot more suitable for astrophotography in the city (I live in a Bortle 6). If you want to capture a more natural-looking image or a broadband subject like a galaxy or star cluster, you can turn it off.
I was also thrilled to see that the telescope also includes an integrated dew heater and that it’s rated to operate down to -10°C (14°F). This simple addition is the difference between a full night of imaging and packing up from my location.
Camera and Telescope Specifications
The Telescope
The 50mm triplet apochromatic refractor telescope inside the Seestar has a focal length of 250mm and a focal ratio of f/5. Normally a 250mm field of view covers a large area of sky, but in combination with the small camera sensor on the Seestar, it is actually quite narrow.
It is interesting to compare this to a stand-alone triplet apochromatic refractor telescope. I couldn’t help but compare the telescope in the Seestar S50 with a William Optics RedCat 51, a 51mm aperture APO with a focal length of 250mm.
Even though the RedCat 51 (a Petzval design) is superior optically, it costs much more than the entire Seestar package. The value of the Seestar starts to become clear when you break down each component of its compact design.
The Camera
The one-shot color astronomy camera inside the unit uses the same CMOS sensor found in the ZWO ASI462MC. This camera captures images and videos that are 1936 x 1096 pixels in size, which equates to about 2 megapixels in total.
Due to the sensor’s shape and size, it creates images in a long, vertical format, about the same size and resolution as a typical phone screen. While this aspect ratio may take some getting used to, the format lends itself well to sharing and viewing images on social media.
One of the biggest limiting factors of the Seestar is its narrow field of view. While I understand why they chose the IMX462 image sensor, I often found myself wanting a larger field of view.
This is especially apparent when capturing large objects like the Andromeda Galaxy. With an imaging window of about 1 degree, you will only be able to capture a section of the galaxy at once.
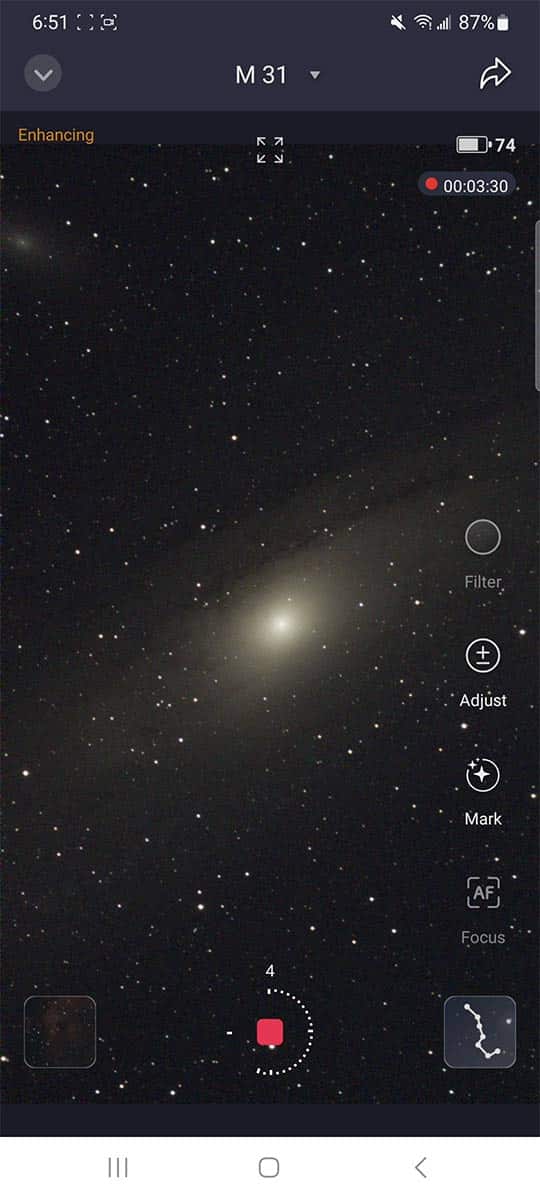

The Andromeda Galaxy being captured by the Seestar S50.
The Tracking Mount
The Seestar S50 uses an altitude azimuth (alt-az) style mount to move the telescope around and track objects in the night sky. While typically, an equatorial telescope mount is needed for long-exposure astrophotography, an alt-az mount like this can still be used as long as shorter exposure times are used.
You do not need to polar align (or ‘star align’ the mount on the Seestar S50 to start taking pictures. The mount uses plate solving to understand where it is pointed in the night sky automatically.
As long as the included tripod and mount are level, you have allowed the GPS setting, and it is dark enough to capture stars in the sky, the Seestar will understand where it is pointed.
Seestar S50 Specs:
- Mount Type: Alt-Az
- Sensor: IMX462
- Resolution: 1096 x 1936 pixels
- Aperture: 50mm
- Focal Ratio: f/5
- Focal Length: 250mm
- Optical Lens: Apochromatic Triplet
- Net Weight: 2.5kg
- Internal Storage: 64 GB
- Transition mode: Bluetooth 5.0, WiFi 5G, 2.4G
- WiFi Range: 15 Feet
- Working Temperature: 0 – 40°C (32 – 104°F)
- Power Input: USB Type-C
- Slew Rate: 1X – 1440X
- Zero Position: Mechanical
- Battery Capacity: 6000mAh
You can review the official Seestar S50 manual provided by ZWO in PDF format.
What’s Included in the Box?
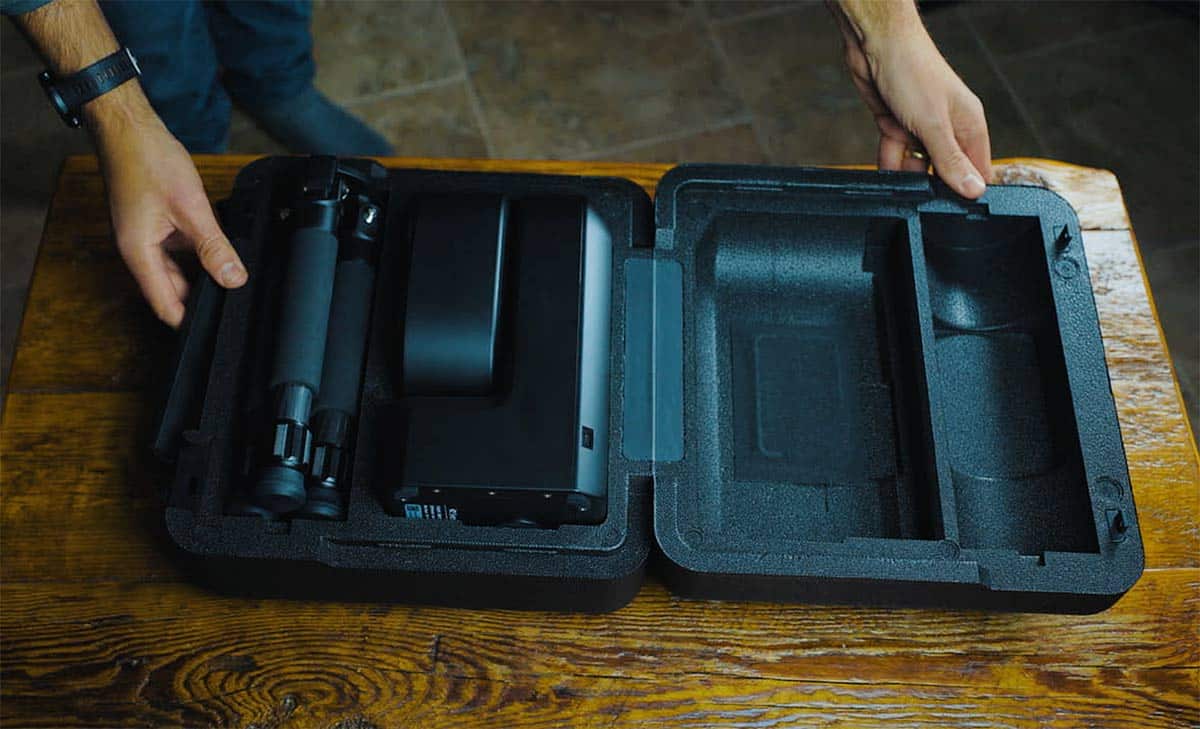
The Seestar S50 weighs 6.6 pounds (3 kg) and comes in an impressive, compact foam carry case. Everything, including the small carbon fiber tripod, fits neatly inside the protective foam case.
The little tripod includes 3/8″ threads and can be extended to a maximum height of 363mm. The tripod legs are quite short, so unless you place it on a table, the unit will be close to the ground when you set it up outside.
While the tripod is small, it is also very stable. A quality, collapsible, lightweight carbon fiber tripod like this adds even more value to the package.
You can also thread the Seestar S50 to a larger tripod, as long as it has the 3/8″ thread size to attach the unit.
- Seestar S50 Telescope Unit
- Mini Carbon-Fiber Tripod (3/8″ thread)
- USB-A to USB-C Charging Cable
- 580-630 nm Solar Filter
- Quick Start Guide
The foam storage case fits all of the components tightly and secure.
Because there is no hand controller or way to operate the unit directly, you need to download the Seestar mobile app and connect to the device using a WiFi connection.
Seestar Mobile App & Sky Atlas
To control the Seestar S50 and download your images, you will have to download the dedicated Seestar app for your Android or Apple device. You can use your smartphone or tablet to control the Seestar.
The Seestar app features a star map (Sky Atlas) with an extensive database of celestial objects, including a ‘tonight’s best’ list.
The sky map is a joy to use and makes it very easy for a first-timer to select a deep-sky target and point to it.
I was amazed at how fast the Seestar found my target (the Orion Nebula) during my first light.
After allowing your location settings, you will see some helpful astronomical weather information, including the moon’s current phase and sunrise/sunset times.
Next, you have the option to select your primary observation mode:
Stargazing Mode
The stargazing mode is where most users will spend the majority of their time. This mode is where you can see a live view of the night sky wherever the Seestar is pointed, and is where you go to start taking and stacking deep-sky images.
The telescope automatically plate-solves the image to determine the layout of the night sky based on your location and provides recommended targets for you to capture. You can press the record (capture) button to start collecting and stacking images, and you will see your image on the screen get better and better.
Dark skies will help you capture the best possible images. They allow you to collect a stronger signal without losing the faint details that are washed out in a city sky. Keep the Seestar’s short focal length in mind when selecting a target.
Solar Mode
With the included solar filter in place, you can use the Seestar S50 to capture detailed views, images, and video of the Sun, including sunspots. I initially ran into some trouble with the Seestar not being able to find the Sun on its own.
After manually pointing the Seestar in the general direction of the Sun, it managed to find it and center it on its own. Finding the Sun with a solar telescope with such a narrow field of view can be tricky.


Using the Seestar S50 in ‘Solar Mode’ with the solar filter in front of the lens.
The included certified solar filter fits perfectly on the objective lens of the Seestar and can help you take pictures of the Sun in white light (not in h-alpha).
Many people successfully recorded the total solar eclipse on April 8th, 2024, using the Seestar S50.
Lunar Mode
The Seestar S50 can take fantastic images and videos of the Moon. For the best possible results, you will want to capture video files in .AVI file format and use planetary image stacking software to select and stack the best frames.
The focal length of the telescope and the CMOS sensor used are well-suited for lunar photography. Because the device can be set up quickly, I can capture the full moon (and many other phases) during a brief cloud break.
Scenery Mode
This mode is used for daytime photography and video of terrestrial objects, such as wildlife or landscapes. While this feature is likely not why most people will buy the Seestar, I think you will be surprised at how fun it is to use.
Having precise control over a lens at a focal length of 250mm (with autofocusing) is a lot of fun. I enjoy using the Seestar in scenery mode to watch the bird feeder in our backyard during the winter.
Seestar S50 Setup
The internal battery can be charged using the included USB-C to USB-A cable plugged into a power charger (like the one you use to charge your smartphone). Once fully charged, it lists a battery life of up to 6 hours.
You can also keep the Seestar topped up by plugging the USB-C cable into a USB power bank. The power bank will charge the battery while it is in use. When it is fully charged, the unit will display four red lights.
To get started:
The first step is to connect the telescope to the tripod securely (using the 3/8″ thread) and set the Seestar S50 up outside. Ensure the tripod is level to ensure the Seestar S50 will work correctly.
- Activate: Press the power button for 2 seconds. The voice prompt will let you know once it’s powered on. Tap connect.
- Connect: Select the device you are connecting to and follow the prompts to complete the connection.
- Open App: After connecting, the app will connect to the internet and activate the device.
- Connect to WiFi: Select the unit you want to connect from the WiFi connection screen. The listed WiFi range is 5 meters, and from that distance, the connection has been very stable for me.
- Observation mode: Choose your observation mode from stargazing, solar, lunar, or scenery.
If you want to take images, select stargazing mode and continue:
- Stargazing mode: Choose your target, and the telescope will automatically point to it.
- Light pollution filter: If you are imaging from the city, it is recommended that you turn on the light pollution filter.
- Anti-dew: If you are in a humid climate where dew on the telescope might be a problem, turn on the anti-dew function.
- Autofocus: Tap the screen to activate autofocus.
- Select target: Select and mark your target and complete a brightness adjustment.
Astrophotography with the Seestar S50
Using the stargazing mode, you can take images of deep-sky objects using the same techniques astrophotographers use to create deep images. The Seestar will automatically take and apply dark frames to your image, which is an important calibration step to improve the final image.
For example, if you’ve selected the Orion Nebula as your target choice, the camera will continuously capture and stack 10-second images, and the picture will get better and better. After about 10 minutes of imaging, you should see a major improvement of the nebula on the screen.
Some people will enjoy using the Seestar S50 simply for EAA, or electronically assisted astronomy. This involves pointing the telescope at various targets in the night sky and enjoying the near real-time view of the object through photography.
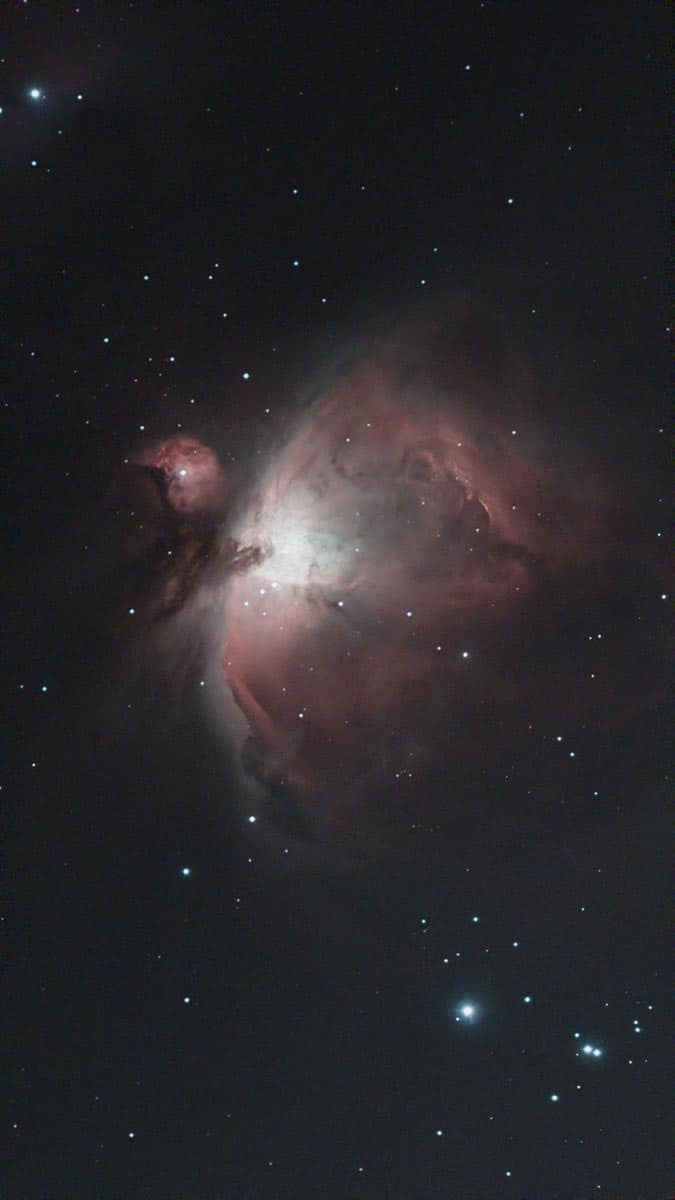

The Orion Nebula using the Seestar S50. Slight edits in Adobe Photoshop to the original stacked image.
For those who want more control over the final image, you can also save the individual sub-frames to stack and process yourself. YouTuber Cuiv the Lazy Geek did an interesting experiment where he stacked 5 hours’ worth of exposure time to create an impressive image of the Pacman Nebula.
In solar and lunar observation modes, you can record videos in MP4 and AVI format and process them using a planetary image stacking tool like Autostakkert or Registax. This process involves selecting a percentage of the best image frames captured to create a sharper overall image of the Moon or Sun.
How Long are the Exposures?
The default exposure time for deep-sky imaging with the Seestar is 10 seconds. This exposure length is set to maximize light collection while avoiding field rotation.
You can increase the exposure time to 20 or 30 seconds in the Advanced Feature menu under the Enhanced EXP section. If you have chosen this setting, the Seestar will take a new set of dark frames before capturing your next target.
I don’t recommend using the 30-second exposure feature, as you will likely see many more frames discarded (due to star trailing) and not included in the stack. The Pompey Observatory YouTube channel published useful example images of this scenario.
For the best results, I recommend using the default 10-second exposure time and collecting light on your subject for at least 30 minutes. My best deep-sky images were created when I collected over an hour of total exposure time.
Mosaic Mode
In the fall of 2024, the latest update introduced a new mosaic mode. This can be utilized when you want to capture a larger target that does not fit inside the default field of view of the Seestar.
To initialize the mosaic mode, click the three dots (more settings) at the top right-hand side of the screen while in stargazing mode. Then, toggle the ‘star mosaic’ option to the ‘on’ position.
Now, you can choose your framing settings (mosaic range) by clicking the ‘framing’ button at the top of the screen. You can expand the framing up to 4X bigger than the original frame.
You can also rotate the frame to ensure your deep-sky object is well-placed within the field of view. Keep in mind that capturing a mosaic will take much longer than a traditional image on the Seestar.
What are the Best Targets to Try?
With a narrow field of view, a limited exposure length (10 seconds), and a small aperture, it should come as no surprise that the best deep-sky objects to observe and capture with the Seestar are ones that are very bright.
The Seestar excels at emission nebulae, supernova remnants, and globular clusters. Here is a short list of recommended deep-sky targets for the Seestar S50:
Accessing Seestar Images on Your Computer
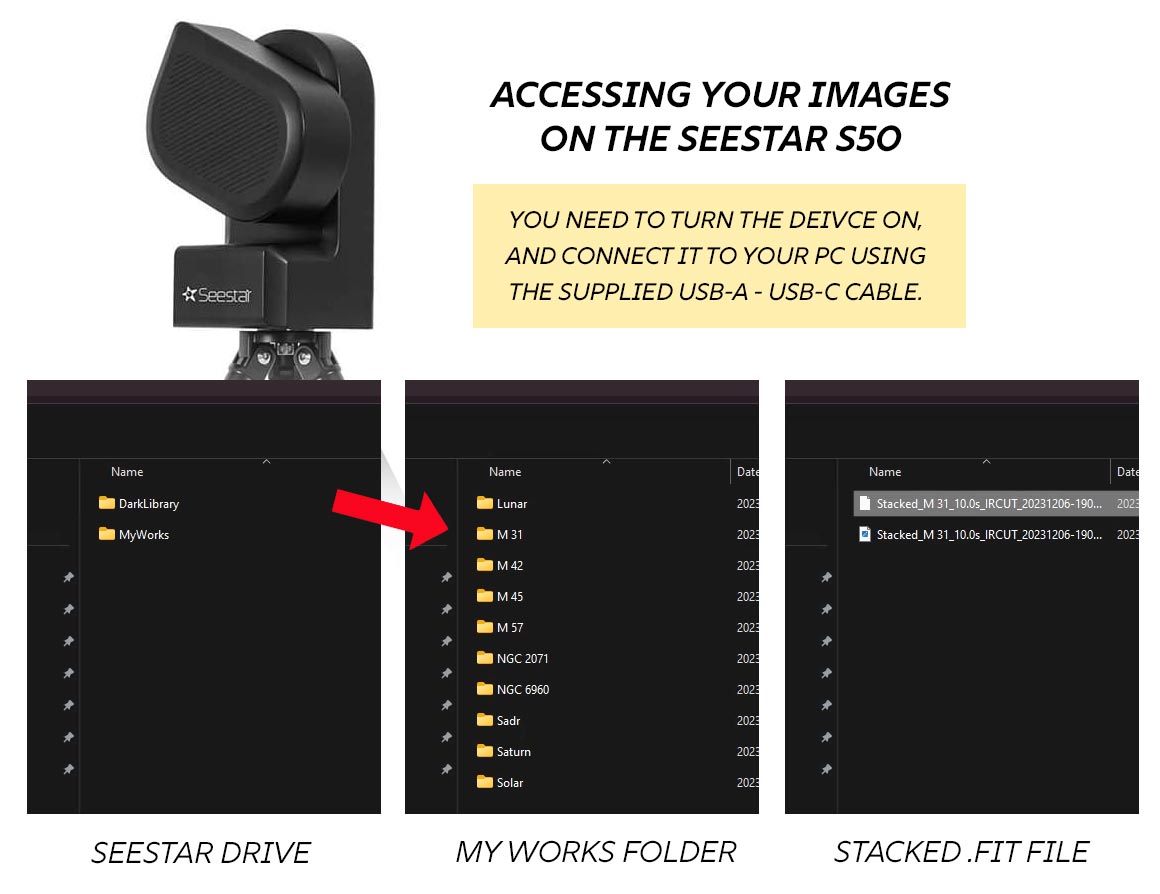
To access and save the deep-sky images you have taken on the Seestar on your computer, you need to power on the seestar and connect it to your PC with the USB cable.
As long as the Seestar is powered on, your computer should recognize the storage device as a new drive on your computer. Look for the ‘MyWorks folder’, as this is where the image files are stored.
Here, you will see all of your projects in their own folders, named after the object you photographed. All projects are found here, from deep-sky nebulae to planets. The file you want to process is the stacked FIT file, not the tiny JPG preview file.
If you took videos of the moon or sun, you’ll see the AVI files here as well. I have not yet explored the option of saving the individual sub-frame exposures to stack myself. So, the image processing starts with stacked, calibrated master file to bring into your favorite image processing software such as PixInsight or Adobe Photoshop.
Keep in mind, to edit the photo using Adobe Photoshop, you will first need to convert the .FIT file format to a TIF file first. This can easily be done using a free tool like DeepSkyStacker.
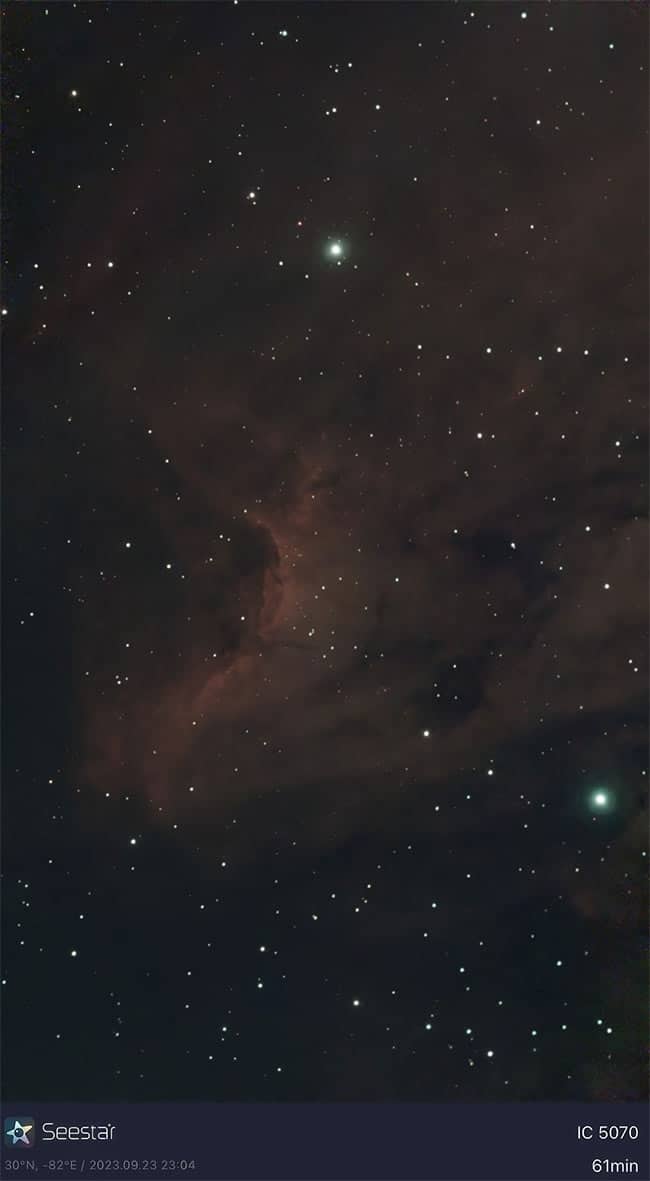

The Pelican Nebula in Cygnus by X User capnrob9756. Seestar S50 (stacking and processing using only the Seestar S50)
Station Mode
You can also access the Seestar S50’s internal storage by connecting to your home network using station mode. Once the device is connected to your home network, you can access the 64GB SD card by searching for the ‘\\Seestar’ folder from your network-connected computer.
Once you have accessed the Seestar folder on the network, you will find all your project folders in the MyWorks folder. This method does not require connecting the Seestar S50 to your computer using the USB-C cable.
Helpful Seestar S50 Accessories
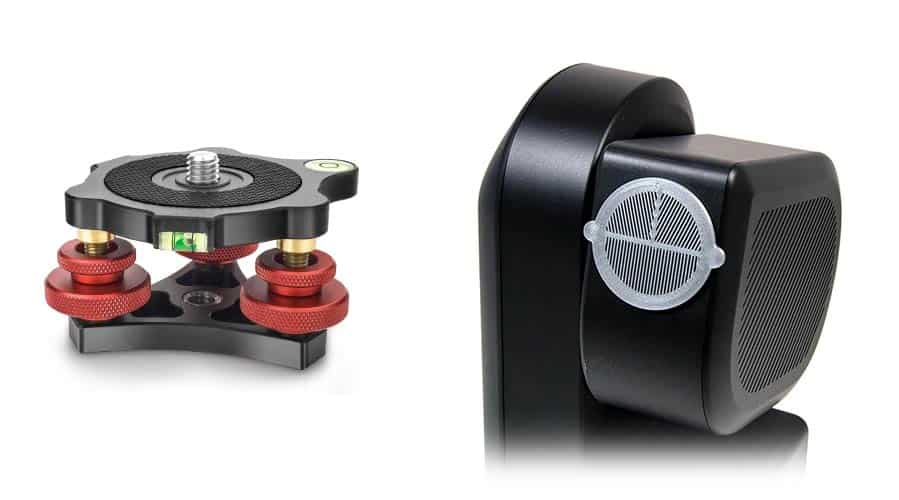
Since the product was announced, several third-party accessories have been produced to help maximize the Seestar S50’s potential. Some of these items include 3D-printed Bahtinov masks and a lens cap to cover the telescope’s objective lens.
I found the autofocus feature on the Seestar to work exceptionally well, but others insist that a Bahntiov focusing mask is needed for precise focus. For a price of $10, I think it’s a no-brainer for those who want to verify that the telescope has achieved critical focus.
Others have mentioned that the use of a camera leveler with a 3/8″ thread is helpful to ensure that the Seestar S50 is perfectly level when in use. While I love the compact carbon fiber tripod that is included with the Seestar, it is very short, and some people have decided to upgrade to a taller model.

Limitations
While there is lots to praise about the Seestar S50, here are some of the limitations to consider:
- Given the size of the sensor, the images are pretty small, and the field of view will limit your projects. Also, the vertical image format might take some getting used to.
- If you’re using the Seestar S50 to explore the night sky and share photos, the relatively low-resolution image size (1920 x 1080) is perfectly fine. For serious astrophotography projects that you can print, you may want to stick to your dedicated astrophotography rig.
- The 50mm aperture isn’t big enough to capture detailed images of super dim objects, and planets are really small at 250mm.
- The alt-az base is not equatorial. This means field rotation in anything over 30 seconds or even sooner will require you to work around this. That means no 5-minute subs on this device.
Keep in mind that this is an entry-level device designed for beginners. For its size and affordable price, it offers a lot of value.
While the small sensor and Alt-Az base limit the Seestar S50’s capabilities, it makes up for these shortcomings with thoughtful strategies (like live-stacking and automatic frame rejection) to deliver the maximum potential of the unit.
Seestar S50 vs Dwarf II and Other Competitors
The Seestar S50 is an affordable smart telescope with attractive features in a small size. However, it is not the only option for those who want to explore amateur astronomy and share it with their family and friends. Here is a comparison chart of the most popular smart telescopes on the market.
| Seestar S50 | Dwarf II | eVscope 2 | Vespera II | |
|---|---|---|---|---|
| Aperture | 50 mm | 28 mm | 114 mm | 50 mm |
| Focal Length | 250 mm | 100 mm | 450 mm | 250 mm |
| Focal Ratio | f/5 | f/3.2 | f/4 | f/5 |
| Sensor | Sony IMX462 | Sony IMX415 | Sony IMX347 | Sony IMX585 |
| Resolution | 1920 x 1080 | 3840 x 2160 | 3200 x 2400 | 3840 x 2160 |
| Battery Life | Up to 6 hours | Up to 2 hours | Up to 10 hours | Up to 4 hours |
| Weight | 3 kg | 1.2 kg | 9 kg | 5 kg |
| Price | $499 USD | $459 USD | $4,899 USD | $2,999 USD |
As you can see, the Unistellar eVscope 2 has much more to offer in terms of resolution and focal length, but it costs nearly 10x that of the Seestar S50. In this category, the Celestron Origin appears to be a better option.
I will be testing the Dwarf III smart telescope very soon (Fall 2024), and I will report back with the differences between that model and the Seestar S50.
Conclusion
If you already have an astrophotography kit with a nice telescope and EQ tracking mount, you can probably take better pictures than the Seestar S50.
Your astronomy camera alone probably costs twice, if not three times the price of this entire package. But that’s not what the Seestar is all about.
It’s about allowing ANYONE to capture objects in the night sky without knowing what dithering or field rotation means. It’s about plunking the Seestar on the ground and tapping a few buttons to see a live view of the Orion Nebula or Andromeda Galaxy.
Whether you’re live stacking a nebula to share it with friends and family, or you’re going deep on a photography project that you’ll process carefully when it’s done, the Seestar S50 delivers the best parts of astrophotography in a fun and easy way.
These are two words that are not often paired together, but I think the Seestar S50 may have finally pulled it off. This little wonder lets amateur astronomers take great images in a short time. The ease of use, dedicated smartphone app, and low price made the Seestar one of the best-selling astronomy products ever – and for good reason.
To stay up to date with my latest astrophotography adventures, you can follow me on Instagram, Facebook, and X.
Trevor Jones
 is a deep-sky astrophotographer and a valued member of the RASC. His passion is to inspire others to start their astrophotography journey on his YouTube Channel, so they can appreciate the night sky as much as he does. His images have been featured in astronomy books, and online publications including the NASA Astronomy Picture of the Day (APOD).
Helpful Resources


